Stable Diffusion on Genesis Cloud

Stable Diffusion, a latent text-to-image diffusion model, is on everyone’s lips. It is able to generate stunning pictures (like the title image of this post) of almost everything you can imagine from just few words (the “prompt”).
This blog post is a step-by-step guide that, when followed through, will end with your own personal Stable Diffusion web interface running on Genesis Cloud.
Prerequisites
To follow along with this tutorial, you will need
- A Genesis Cloud account
- If you do not yet have an account, you can sign up here.
- An SSH key pair with your private key configured in your SSH client and the public key added to your Genesis Cloud account.
- Check out our knowledge base article for more details on how to do that.
Step-by-Step Guide
Instance Creation
Before we get to the installation of any software we need to spin up an instance on Genesis Cloud:
- Log on to the Genesis Cloud console at https://console.genesiscloud.com using your account.
- Click
Create New Instance. -
Select the location for your new instance.
If you do not know which one to use, pick one closer to you. This reduces the latency and makes every interaction a bit smoother.
-
Give the instance a hostname.
You can use, e.g.,
stable-diffusion-tutorialor juststable-diffusion. -
Select the GPU type.
All Nvidia RTX 30 series cards are viable choices when working with Stable Diffusion. As a rule of thumb, the more video memory the card has, the larger images you can create. We will use the
NVIDIA® GeForce™ RTX 3060Ticard for this guide. Later, you can easily take a snapshot of your system and create a new instance from it using a larger GPU. - Toggle the
Install NVIDIA® GPU driver 470slider into the active position.- Alternatively, you can install the drivers manually. As the manual installation process is a bit more involved, we assume you used the automated driver installation for the rest of this guide.
- Select
Ubuntuin version20.04as the system image for your instance. - The SSH key you added to your account beforehand will already be pre-selected.
- Click
Create Instance.- Your instance will be created, and the console dashboard will display it. There will be a message, and the public IPv4 address will become visible. This process usually takes 1-2 minutes.
Software Installation & Configuration
Unless noted otherwise, all the following steps are to be executed via SSH on your instance.
The process of connecting via SSH to your instance differs depending on what SSH client you use. Users of Putty on Windows can find a detailed guide at here and users of the command line SSH client on Linux or macOS can check out this.
For the rest of this guide we assume that you are connecting from a Linux system.
-
SSH into your instance.
The default username is
ubuntu, and the IPv4 address of your instance is displayed on the console dashboard. Linux and macOS users connect by executing:ssh ubuntu@<IPv4 address of your instance>
Update the System
Make sure that the whole system is up to date.
You might be able to skip over this step to save some time but, in turn, might miss out on important security and stability fixes. We recommend that you always keep all software on your instance up to date to avoid issues further down the line.
-
Update list of available packages:
sudo apt update -
Update everything to the newest available version:
sudo apt -o Dpkg::Options::="--force-confold" upgrade --yesThe command shown here will automatically confirm all questions which might otherwise interrupt the process and wait for confirmation. On existing production systems we would not recommend blindly confirming every prompt or warning from your package manager, but as this here is a freshly created instance, there is no real risk of losing any data, and we opt for the convenience it gives to us 😉.
Depending on when you are following this guide, the upgrade process might take anywhere from a few seconds to a few minutes.
You might notice a warning message if you are pretty fast and running the apt upgrade command shortly after the instance has been created. The warning will tell you that another process is still running in the background, blocking access to some files. This behavior is expected as the GPU driver installation was automatically started in the background. You can just wait until it is completed, and your system upgrade will continue. If you are curious what is going on in the background, you can check the log file at
/var/log/cloud-init.logfor more details.
Install Python 3.10.6
While the Python ecosystem is excellent in that you will find tools and libraries for almost everything, it is, at the same time, a complex beast to tame. To avoid compatibility issues later on, we will install the exact Python version recommended by the Stable Diffusion WebUI authors. Unfortunately, that exact version is not readily available via the Ubuntu software repositories, so we will have to build it ourselves.
- Install dependencies (for the Python build process and Stable Diffusion)
sudo apt install liblzma-dev libbz2-dev libgl1-mesa-glx libffi-dev libx11-6 libxext6 libgl1-mesa-glx unzip --yes - Install additional fonts
sudo apt install ttf-mscorefonts-installerYou will be prompted to read and accept the license terms before the installation continues.
- Download, Build, and Install Python
# Download the Python sources wget https://www.python.org/ftp/python/3.10.6/Python-3.10.6.tar.xz # Extract the sources tar xf Python-3.10.6.tar.xz # Change into the extracted directory cd Python-3.10.6/ # Run the configuration script ./configure # Build Python, parameter will parallelize the process to speed up this step make -j$(nproc) # Install Python into our system using an alternative name to avoid conflicts sudo make altinstall- Our Python build will be available as
python3.10binary, while the one that came with Ubuntu is still available aspython3. Thealtinstallmethod avoids conflicts between them.
- Our Python build will be available as
Download the Stable Diffusion Model
We will download the Stable Diffusion model using the BitTorrent protocol. The advantage of this over an HTTP download is that the network traffic is spread over multiple parties, and we do not have a single point of failure in the form of the originating web server.
- Install torrent client and download the model:
# Return to our home directory
cd ~
# Install a (lightweight) torrent client
sudo apt install aria2 --yes
# Download the model checkpoint file
aria2c --seed-time=0 'magnet:?xt=urn:btih:3A4A612D75ED088EA542ACAC52F9F45987488D1C&tr=udp://tracker.opentrackr.org:1337/announce&dn=sd-v1-4.ckpt'
# The download should start latest after a few seconds
The download usually completes in less than 5 minutes.
- Please note: The Model is available under the
CreativeML Open RAIL-Mlicense. Please see this page for details.
- Please note: The Model is available under the
Installing the Stable Diffusion WebUI
As of the time of writing this guide, several alternative web UIs for Stable Diffusion are publicly available. We experimented with most of them and feel that the version from GitHub user AUTOMATIC1111 is the most polished one at this time and therefore it is the one we recommend.
- Clone the repository and make the model available at the expected location
# Clone the repository git clone https://github.com/AUTOMATIC1111/stable-diffusion-webui.git # Symlink the model file to where it is expected by the WebUI code ln -s ~/sd-v1-4.ckpt ~/stable-diffusion-webui/models/model.ckpt - Change the
webui-user.shscript to use our custom Python build. To do that remove the#in front ofpython_cmdin the file and change it frompython3topython3.10using your favorite editor.-
Alternatively, execute the following command to make the change:
sed -i 's/#python_cmd="python3"/python_cmd="python3.10"/g' stable-diffusion-webui/webui-user.sh
-
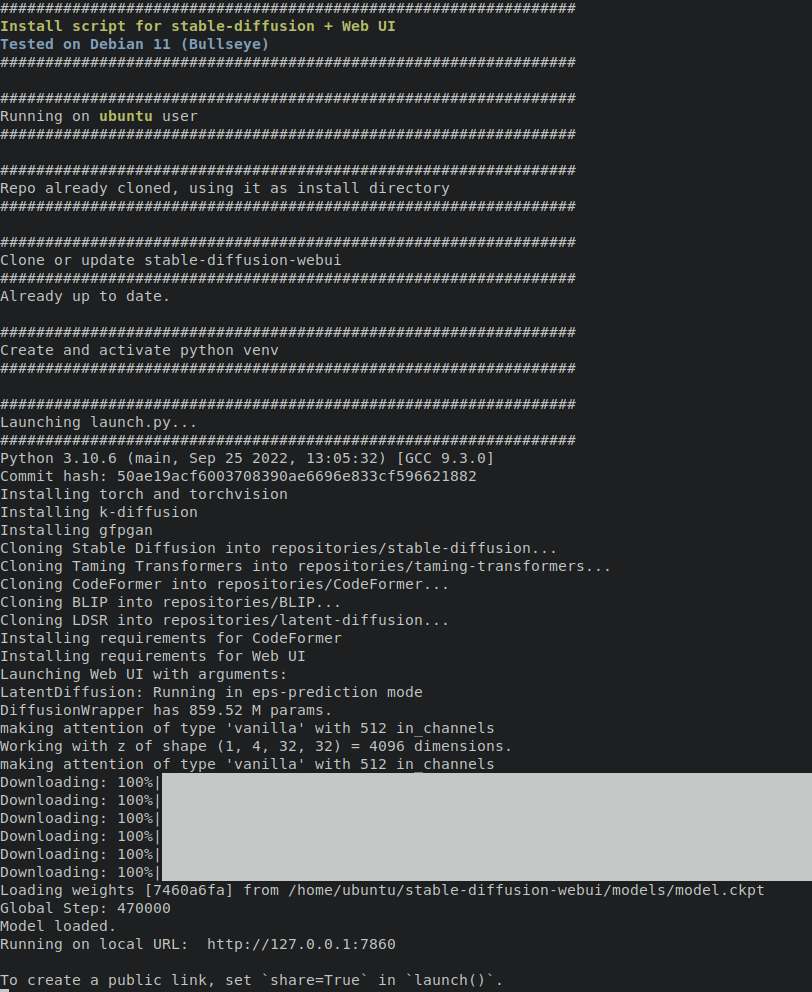
- Execute the setup/start script
# Change into the WebUI repository directory # Do *not* skip this step! Script assumes to be called from within the directory. cd stable-diffusion-webui/ bash webui.sh- On the first run, the script will update the WebUI code, download some more dependencies (e.g., components required for the automatic face restoration or upscaling), and install all the required Python modules (like torch and torchvision) into a Python virtual environment (“venv”) which might take a few minutes.
- To start the WebUi in the future simply navigate into the
stable-diffusion-webuidirectory and executebash webui.shagain. The startup time will be much faster as the downloads are still available from the last time.
Accessing the WebUI
On Genesis Cloud your instances are, by default, protected by our firewall. This protection does not allow direct access to the port used by the WebUI from just anyone on the internet.
You can either update your network security groups to change that (check out our guide titled “How to create Security Groups to control your instance network traffic” for details) or you can utilize the SSH port forwarding functionality.
We strongly recommend that you access the WebUI employing SSH port forwarding as the WebUI was not developed with security considerations for public hosting in mind.
Linux and macOS users
You can use the port forwarding feature built into your SSH client to access the WebUI listening on port 7860 of the server. Disconnect your current session (you can terminate the running WebUI from the last step by pressing CTRL+C in your existing SSH session), and append -L 127.0.0.1:7860:127.0.0.1:7860 to the SSH command line you used before.
It should like similar to this:
ssh ubuntu@<IPv4 address of your instance> -L 127.0.0.1:7860:127.0.0.1:7860
Once you are reconnected this will forward your local port 7860 to 7860 on the server’s loopback interface.
Restart the WebUI (cd stable-diffusion-webui; bash webui.sh) and once you see Running on local URL: http://127.0.0.1:7860 you can open it in your browser at http://127.0.0.1:7860/.
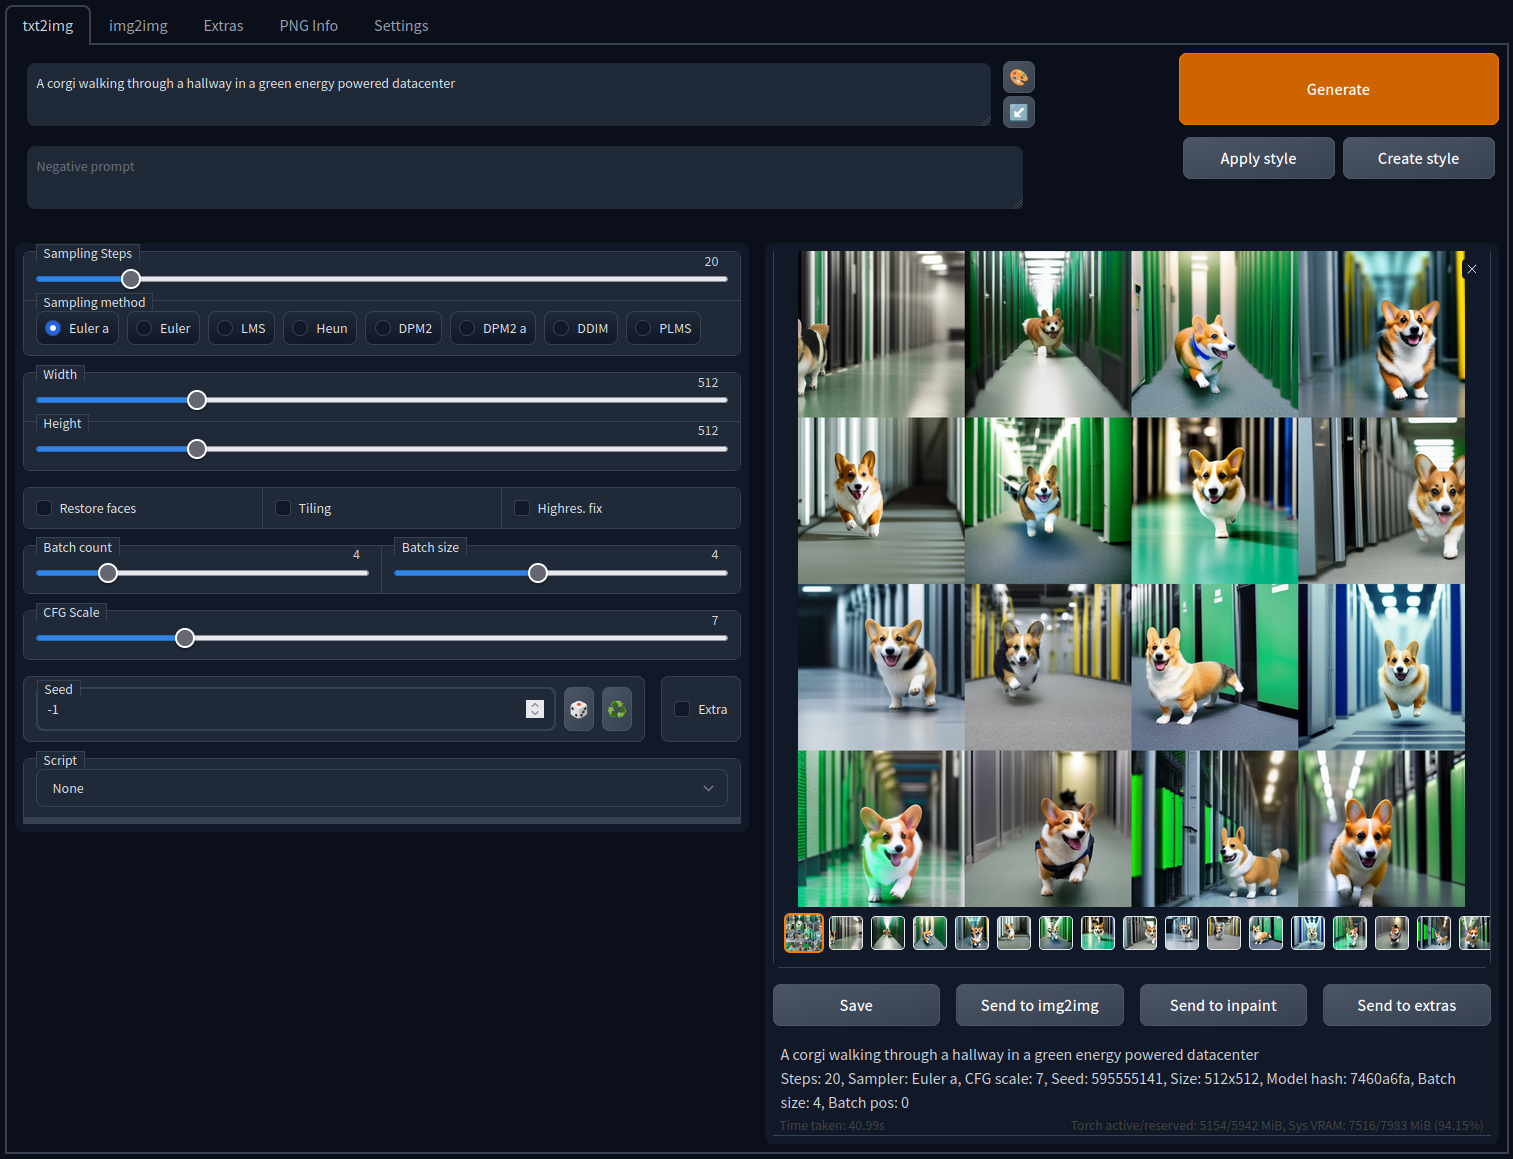
Final Step: Testing
Learning how to create a prompt that generates great images can take a while. Something which works surprisingly reliable is corgis in data center hallways 🐶 😂:
Keep accelerating 🚀
The Genesis Cloud team
Never miss out again on Genesis Cloud news and our special deals: follow us on Twitter, LinkedIn, or Reddit.
Sign up for an account with Genesis Cloud here and benefit from $15 in free credits. If you want to find out more, please write to [email protected].
Written on September 25th, 2022 by Tristan Helmich