DIY AI Assistant: A Guide to Running Your Own Private Open Assistant on Genesis Cloud
1. Introduction
In this blog post, we will guide you through the process of setting up and running your own private Open Assistant. Open Assistant is a chat-based assistant capable of understanding tasks, interacting with third-party systems, and retrieving information dynamically. It is a genuinely open-source solution, unlike other popular solutions that only include the word “open” in their names.
By following this tutorial, you can harness the power of Open Assistant without relying on third-party inference APIs or exposing your conversations to external entities.
Requirements
To follow this tutorial, you will need:
- A Genesis Cloud account
- If you don’t have an account yet, sign up here.
- An SSH key pair, with your private key configured in your SSH client and the public key added to your Genesis Cloud account.
- Refer to our our knowledge base article for more information on setting this up.
2. Step-by-Step Guide
Set Up a Genesis Cloud Instance
- Sign in to the Genesis Cloud console using your account.
- Click
Create New Instance. -
Choose the location for your new instance: 🇮🇸 / 🇳🇴
If you’re unsure, select one closer to your location to reduce latency, which will be beneficial later in the process.
- Assign a descriptive hostname to the instance, such as
openassistant-tutorialor simplyoa. - Select the GPU type. To avoid issues with running out of vmem for your model later on, opt for an
NVIDIA® GeForce™ RTX 3090instance. The “CPU & Memory optimized” instance types are a good choice as they provide double the system memory, which is sensible for this use case. - Make sure the driver installation toggle is inactive. We’ll manually install the correct drivers to ensure compatibility with all software.
- Choose
Ubuntuversion20.04as the system image for your instance. - The SSH key you added to your account earlier should be pre-selected.
- Click
Create Instance.
Your instance will be created and will appear on the console dashboard. A message will be displayed, and the public IPv4 address will become visible. This process usually takes 1-2 minutes.
Preparing the Base System
Unless stated otherwise, execute all the following steps via SSH on your instance.
Windows users can use Putty (guide available here), while Linux or macOS command line SSH client users can refer to this knowledge base entry.
-
Configure a local Ubuntu mirror and update the base system.
The examples below assume you created your instance in Norway. If you used Iceland, replace the country code
NOwithIS. This command will configure your apt to use a mirror in the selected country, ensuring optimal download speeds for system packages.sudo sed -i 's/nova.clouds./NO./g' /etc/apt/sources.list && sudo apt update -
Upgrade all packages (without prompting for confirmation).
sudo apt -o Dpkg::Options::="--force-confold" upgrade --yes
Install CUDA 11.8
At the time of writing, CUDA 12 was released. As the compatibility of many software packages is not yet a given we install CUDA 11.8 to avoid unexpected issues.
-
Install CUDA
Ensure you have read, understood, and agreed to the appropriate EULA.
wget https://developer.download.nvidia.com/compute/cuda/repos/ubuntu2004/x86_64/cuda-keyring_1.0-1_all.deb sudo dpkg -i cuda-keyring_1.0-1_all.deb sudo apt-get update sudo apt-get -y install cuda-11-8 -
Add CUDA to the relevant paths to ensure it can be found. Execute the following sed command to add two export statements that set the proper environment variables to your
~/.bashrcfile:sed -i '1i\export PATH="/usr/local/cuda/bin:$PATH"\nexport LD_LIBRARY_PATH="/usr/local/cuda/lib64:$LD_LIBRARY_PATH"\n' ~/.bashrc -
Reboot (do not skip)! The reboot is required to load the NVIDIA drivers, as the current system still has the
nouveaudrivers loaded, causing a conflict.sudo reboot
Setup of oobabooga/text-generation-webui
We will use the text-generation-webui to interface with the Open Assistant model.
-
Install
Miniconda3curl -sL "https://repo.anaconda.com/miniconda/Miniconda3-latest-Linux-x86_64.sh" > "Miniconda3.sh" # The next command installs Miniconda in batch mode. It expects that you agree with its license terms! bash Miniconda3.sh -b -u -p $HOME/miniconda3 ~/miniconda3/bin/conda init $(basename $SHELL) -
Now close your shell (or disconnect your SSH session) and re-connect. If you see a
(base)in front of your prompt, the Miniconda install succeeded. -
Install the build dependencies
sudo apt -y install build-essential -
Create a new conda environment for all of our Python dependencies
conda create --yes -n textgen python=3.10.10 -
Activate your conda environment. This step must be repeated every time you are in a new session as it is not persisted (e.g., after disconnecting SSH or restarting your instance).
conda activate textgen -
Install torch and related Python packages via pip. We specifically select a version compatible with CUDA 11.8 that we installed earlier:
pip3 install torch torchvision torchaudio --index-url https://download.pytorch.org/whl/cu118 -
Install the web UI and its requirements
git clone https://github.com/oobabooga/text-generation-webui
cd text-generation-webui
pip install -r requirements.txt
Downloading the Open Assistant Model
As outlined in the README of the text-generation-webui we have to place the models in the aptly named models folder.
Luckily, this is mostly automated. Execute the following command in the current directory to take care of it:
python3 download-model.py OpenAssistant/oasst-sft-4-pythia-12b-epoch-3.5
This will download the ~23 GB open/free model data from the Hugging Face servers. There are other variants with questionable legality floating around, use those on your own risk. Your Genesis Cloud instance can (by default) download with up to 1Gbit/s so you can expect this step to take 4-5 minutes depending on the load and connectivity of the servers.
Starting the Web UI
Now that we have the model in place, we can start the web UI:
python3 server.py --gpu-memory 22 --share
If you use a GPU other than a RTX3090, you need to adopt the --gpu-memory parameter. The same is true if you want to use multiple GPUs. Running python3 server.py -h will provide more details and examples.
Suppose you disconnected your SSH session to set up the forwarding. In that case, you need to re-activate the conda environment, switch to the text-generation-webui directory, and start the server again:
conda activate textgen
cd text-generation-webui
python3 server.py --chat --model OpenAssistant_oasst-sft-4-pythia-12b-epoch-3.5 --gpu-memory 22 --share
# Give it a few seconds to load the model and start-up
You can now access the web UI at the displayed URL (https://….gradio.live) 🎉
We recommend to not rely on the gradio proxy service to access the service but accessing it in another way. As there are many ways to skin this cat (SSH port forwarding, local proxy with TLS termination, using (free) Cloudflare fronting, …) it should be out of scope for this article (though not relying on the public gradio proxy service makes it much more responsive).
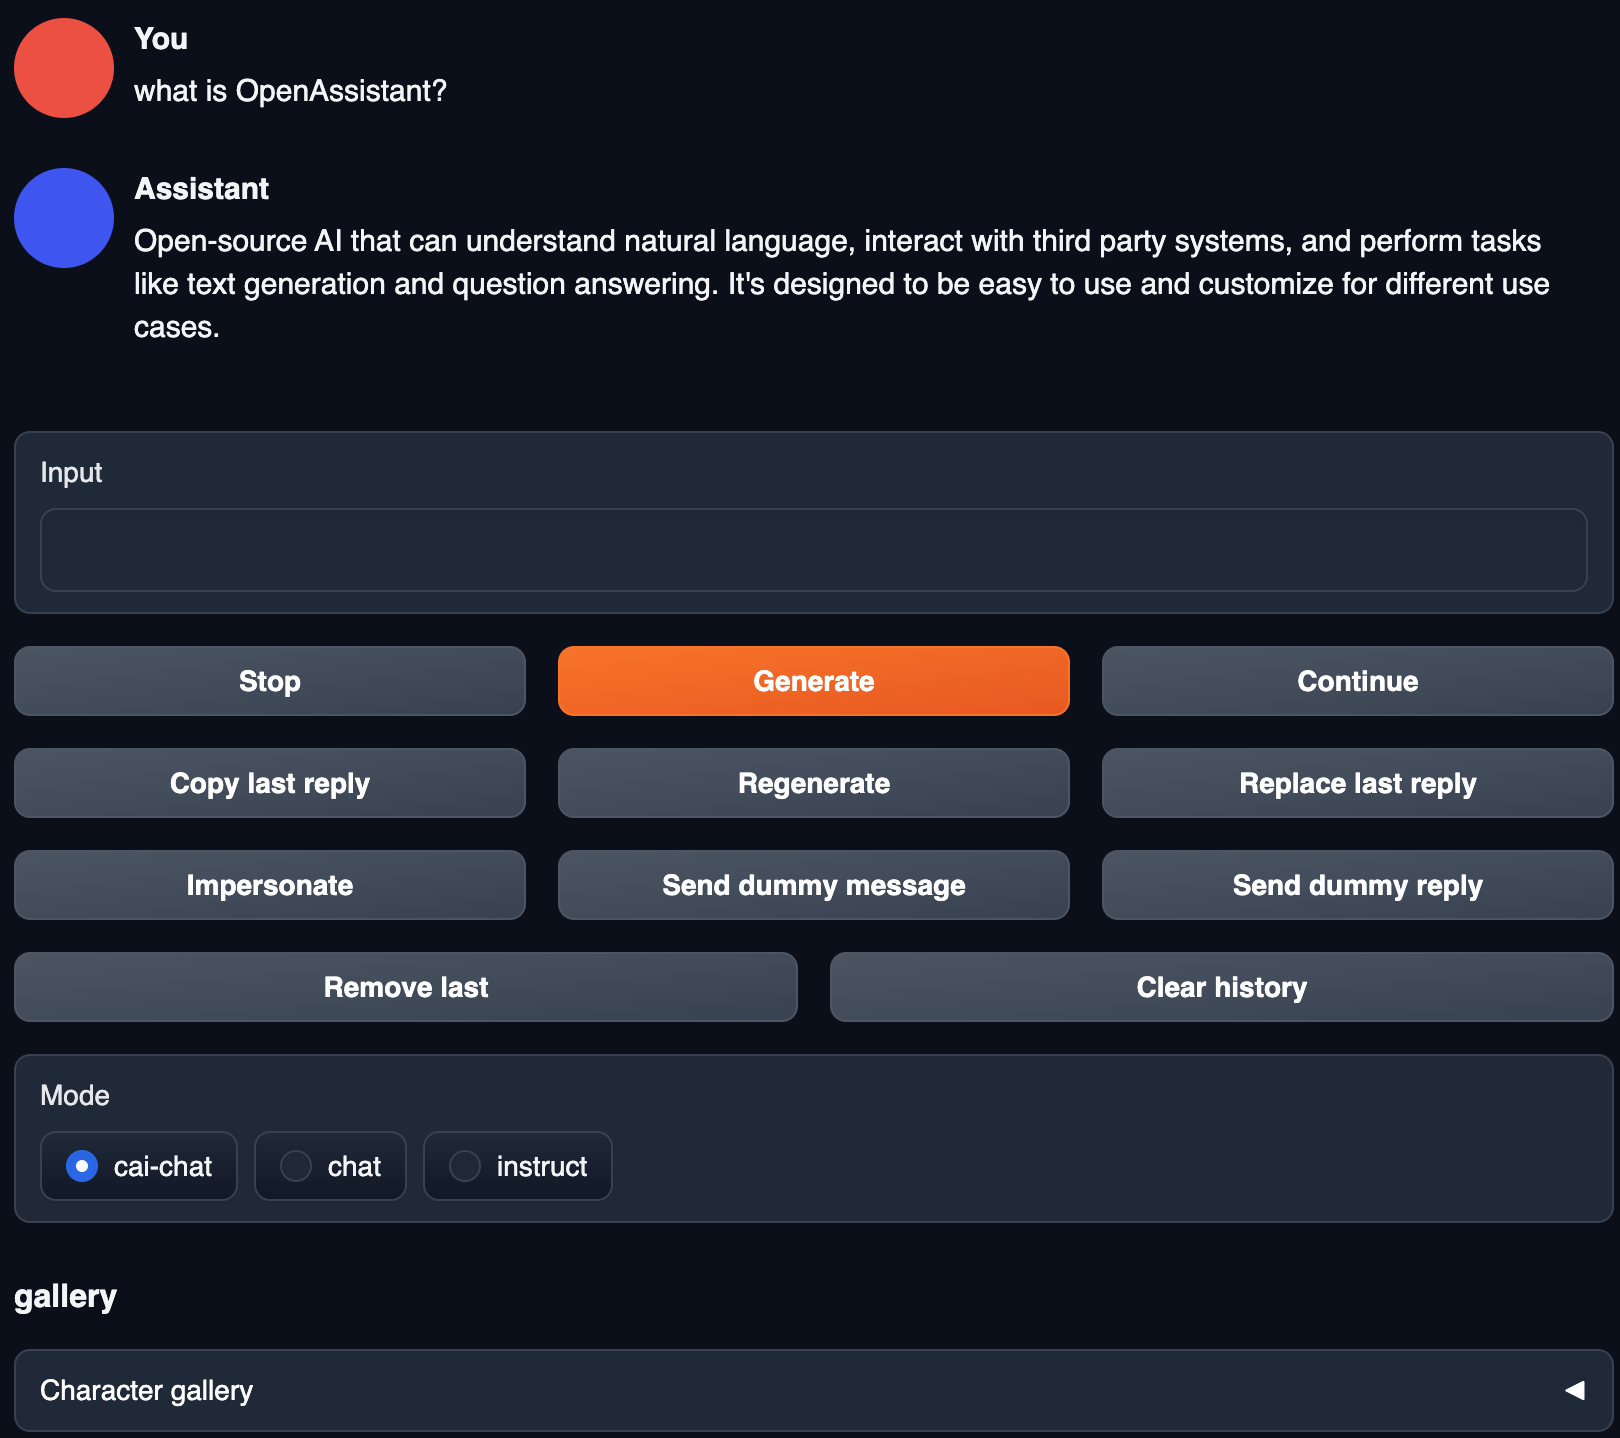
3. Using the Web UI
Now that everything is up and running we want to use the WebUi. Is it as easy as it gets:
- Open web UI in your browser.
- Enter a message to the OpenAssistant into the chat box.
- Be amazed by the eloquent responses ;)
If you only get truncated responses, check your console output for OutOfMemoryError messages.
You can work around those by using an instance with multiple (e.g., 2x RTX 3090) GPUs. If you use multiple GPU make sure to adopt the --gpu-memory parameter appropriately by noting the amount of vmem that should be allocated separated by spaces. E.g., --gpu-memory 23 23 for 2x RTX 3090).
Keep accelerating 🚀
The Genesis Cloud team
Never miss out again on Genesis Cloud news and our special deals: follow us on Twitter, LinkedIn, or Reddit.
Sign up for an account with Genesis Cloud here and benefit from $15 in free credits. If you want to find out more, please write to [email protected].
Written on April 20th, 2023 by Tristan Helmich, Marouane Khoukh